

0330 128 1399
Customer service
Customer service
Our customer support is available every working day between 8am and 5pm.
Tutorial: Create and disable units
Your Viking account is usually created for the top hierarchical unit of your organisation. You can map lower levels of your organisation by having managers create additional units. These units can be, for example, branches, subsidiaries or affiliates of your highest organisational unit. Creating units helps you to allocate costs more accurately to the places where they are incurred.
Below we explain how to create new units in your Viking account.
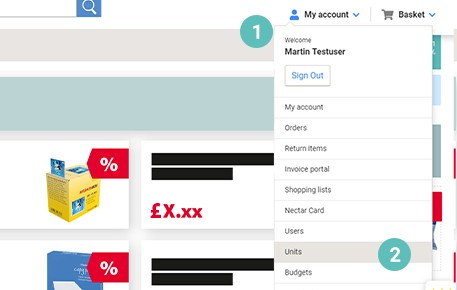
Step 1:
Log in to your Viking account as a manager
- Open the drop-down menu under “My account“ (1).
- Click the menu item „Units“ (2).
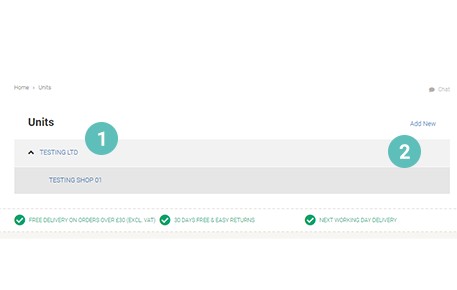
Step 2:
You now get to an overview of all existing units for your Viking account.
- By clicking on your highest organisational unit (1), you can display or hide all units already created below it.
- To create a new unit, please click on “Add new” on the overview page (2).
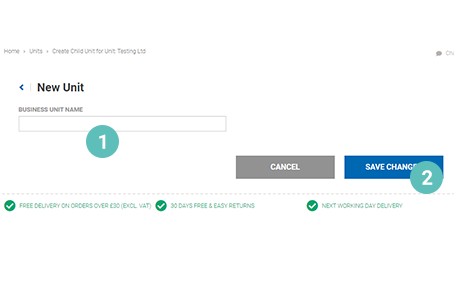
Step 3:
- You can now name your new unit. To do so, please enter the name of your new unit in the input field “Business unit name” (1).
- Please proceed by clicking on “Save changes” (2).
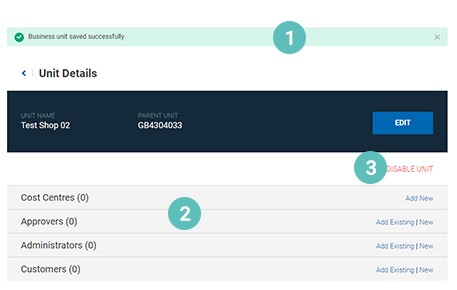
Step 4:
- You now get to the overview page of your new unit. The status message “Business unit saved successfully” shows you, that you have successfully created your new unit (1).
- On the overview page, you can also administer your unit and add cost centres or users for example (2).
- If necessary, you can also deactivate existing units here, e.g. because this unit has ceased business operations or no longer exists. To do so, please click on "Deactivate unit" (3).
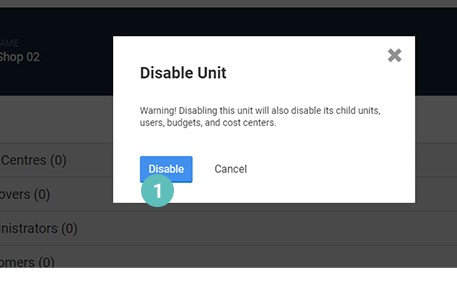
Step 5:
After choosing “Disable unit”, you are asked to confirm your request.
Please note: If you deactivate a unit, all sub-units, users, budgets and cost centres associated with that unit will also be deactivated.
- If you want to proceed and disable the unit, please click on “Disable” (1).
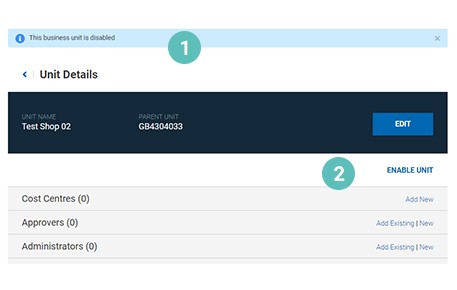
Step 6:
- You now get back to the overview page of the disabled unit. The status message “This business unit is disabled” shows you, that you have successfully disabled the unit (1).
- You can reenable the unit by clicking on “Enable unit” (2).
Please also have a look at other tutorials on our site regarding the administration of units. For example, tutorials on cost centres and budgets can give you helpful tips on how to manage your units efficiently.